Continued for more detail…
Preface: Expensive Cameras and Lights Not Needed
With practice and decent lighting, most phone cameras work fine.
Don’t believe me? Scroll down to the bottom to see results from this simple set up.
First of all, great photography, including coin photography, is not about fancy equipment. Expensive equipment certainly doesn’t hurt. But the truth is almost all modern photography equipment is of excellent quality.
We took all photographs for this article with a 3 year old phone camera. We used two antique table lamps on an inexpensive card table. Two lights are preferable, but one will do.
Great coin photography (well, all photography, really) is about taking time and care.
1) Cameras for Coin Photography
Any Camera Will Do
In general, most decent smartphones work fine for coin photography. You just need a little patience and time to do it right, child.
If you have a macro mode, use it. If you can fix certain settings, like your white balance and exposure settings, do it. If you can’t, or don’t know how to, don’t worry about it. All you need is patience.
For low light situations, tripods help. (Cheap ones are fine.) Tripods are not necessary. Use your old and to brace steady hands, and you have the same thing.
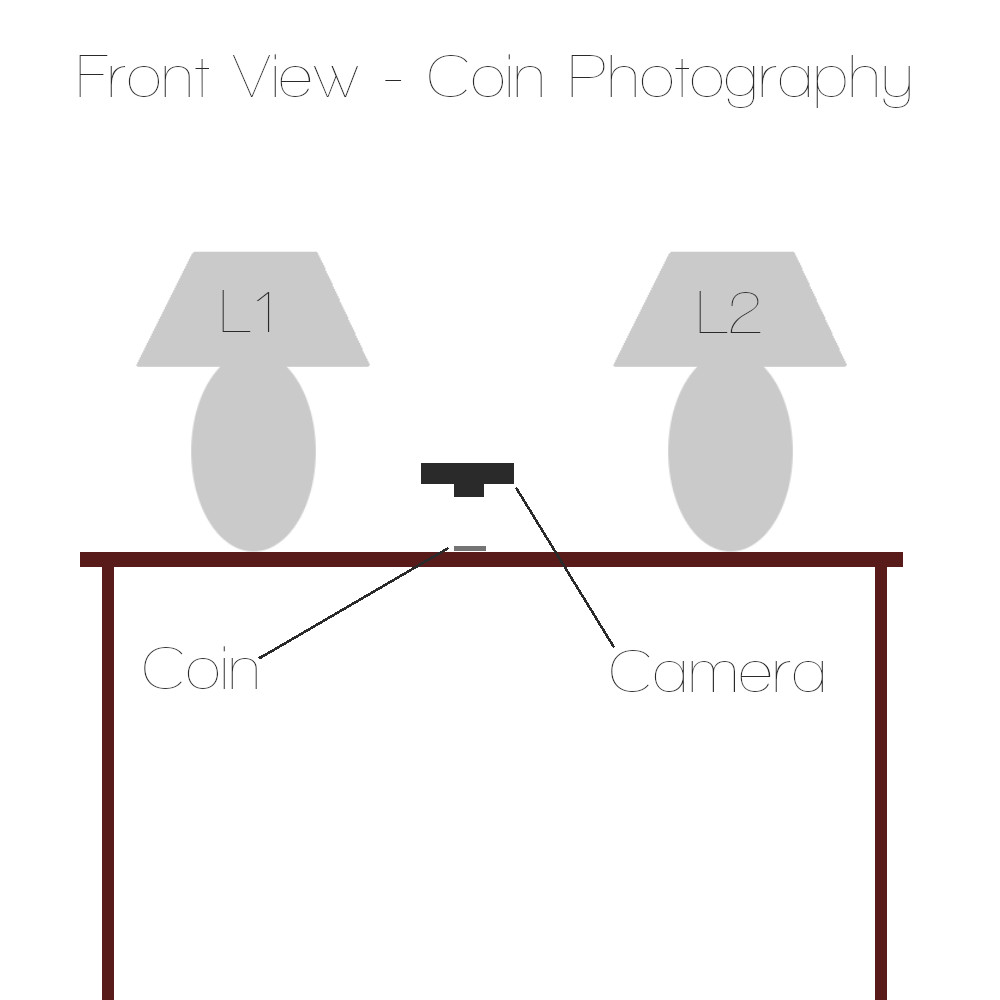
2) Lighting for Coin Photography
Any Lights Will Do
In general, don’t use your camera’s flash or lighting for coin photography. They’re usually too bright.
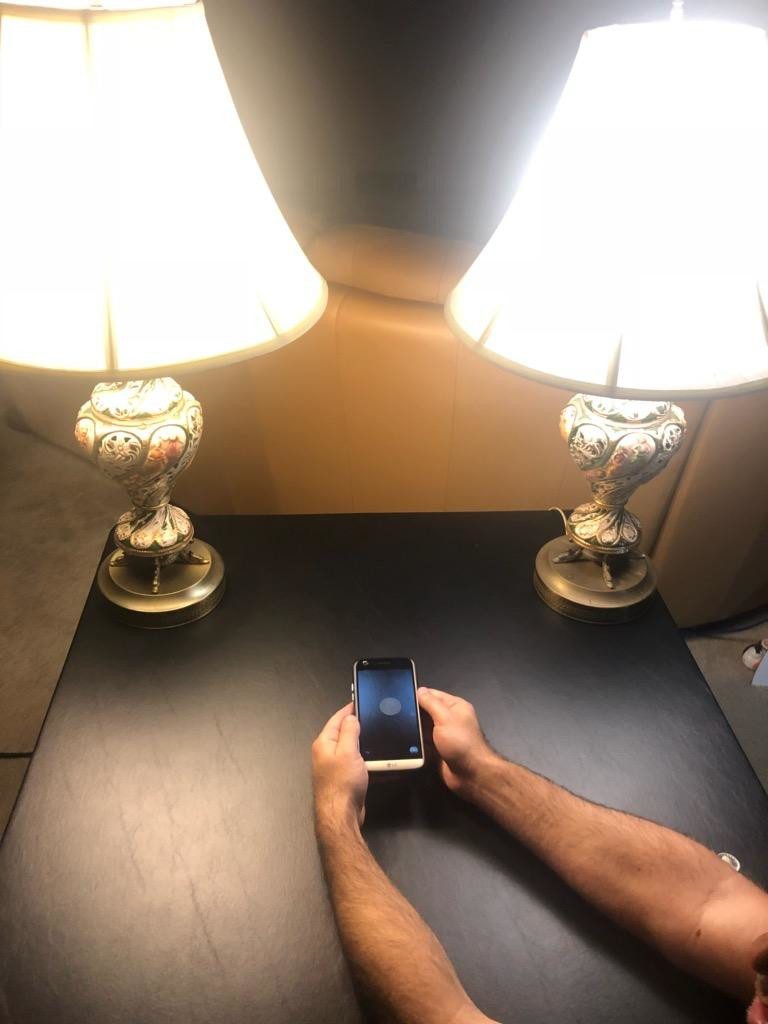
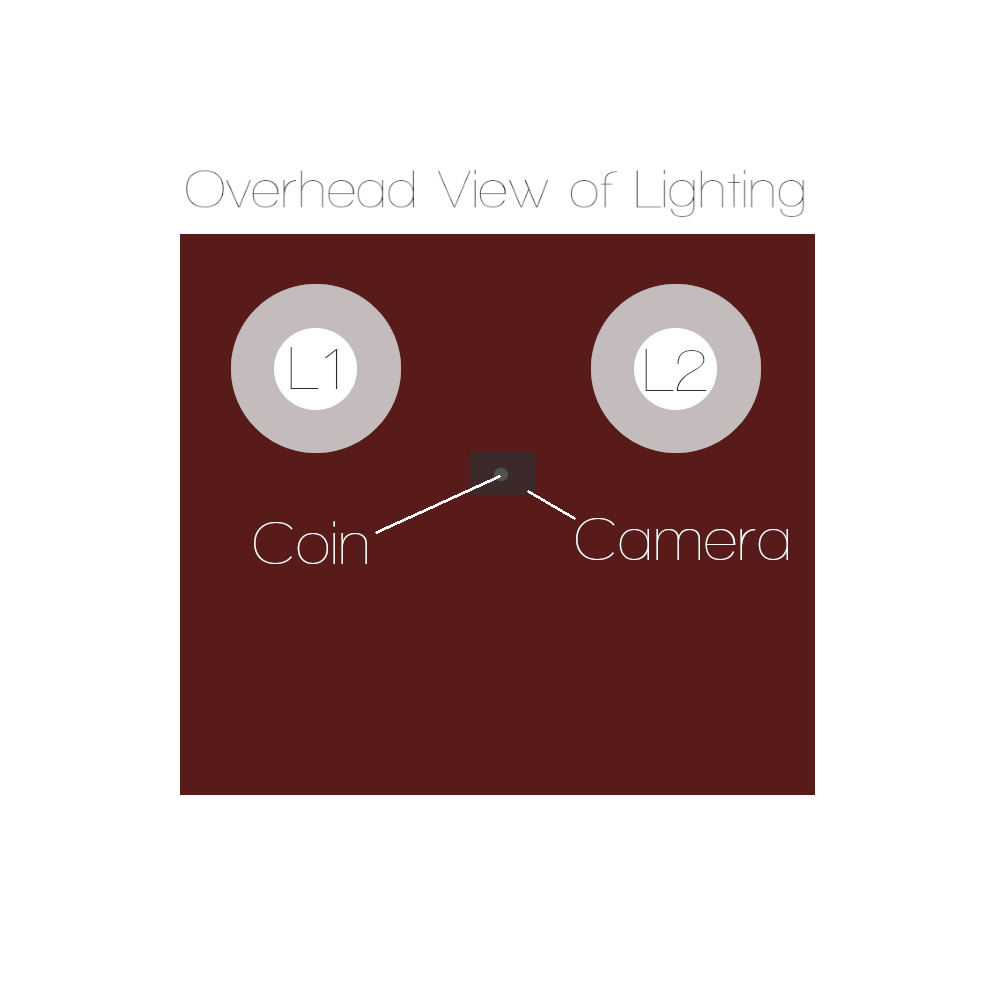
Use (ideally) two lamps with the same color and brightness bulb. Table lamps are fine. And even if the bulbs are different, they’ll probably work okay.
If your lights are too bright, move them away from the coin. If your coin is too dark, move your lamps closer to the coin, or find another way to brighten them. Or find brighter lamps.
For coin photography, you want diffuse, even light, like from a bright window with a light curtain over it. With a little work, lamps produce acceptable light over a small area.
What you don’t want for coin photography is focused, columnar light, like you get from a flashlight. When you point a flashlight at the ground a foot away, you know all those strange, uneven bright and dark spots? You don’t want that.
Bright lighting can be difficult to take with bright, silver coins. Low lighting can be difficult to brighten up dark patina copper coins. So easily- adjusted lighting is ideal.
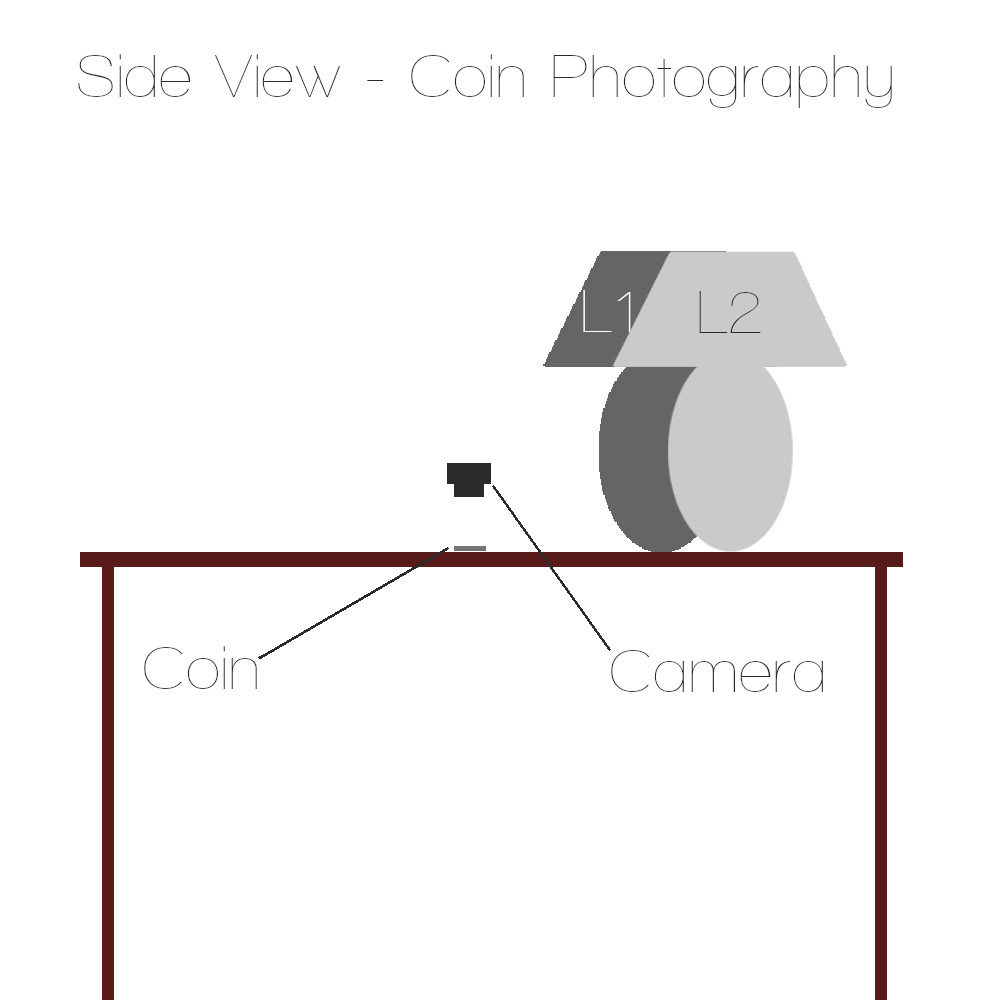
3) Set Up for Coin Photography
Any Table Will Do
Choose a table that will works well with your lighting and camera.
Give your coin a neutral backdrop, ideally matte gray. A piece of neutral-colored paper or felt works great. Neutral colors like white, black, and gray won’t trick your digital camera. (If you know how to manipulate your camera’s white balance settings to work with your lights, you may wish to do that. Otherwise, use a neutral color background.)
If you use a tripod for coin photography, make sure it works well with the table. The primary purpose of a tripod is to gold the camera steady. A secondary purpose is to make sure the pictures all come out the same.
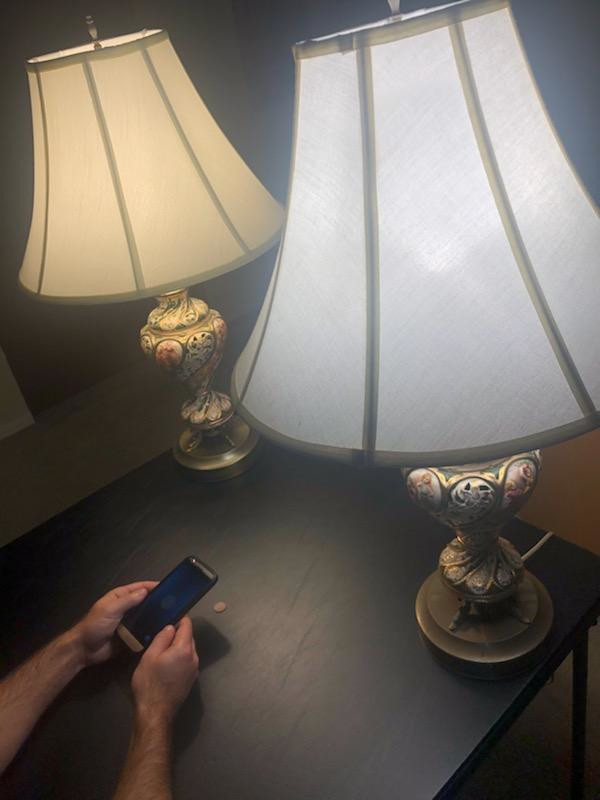
This is all you need for great coin photography! Old phone, old lamps, and a table. Ideally, use a neutral background color – like this black table.
A tripod can definitely help. But holding the tripod close to the coin while not blocking the camera is difficult. Resting your elbows and wrists on the table helps greatly with stability, and you have the freedom of movement to take a gaggle of photographs from slightly differing angles.
The two-light set up works great. It just takes practice. And in the world of digital photography with unlimited film, go to town practicing!
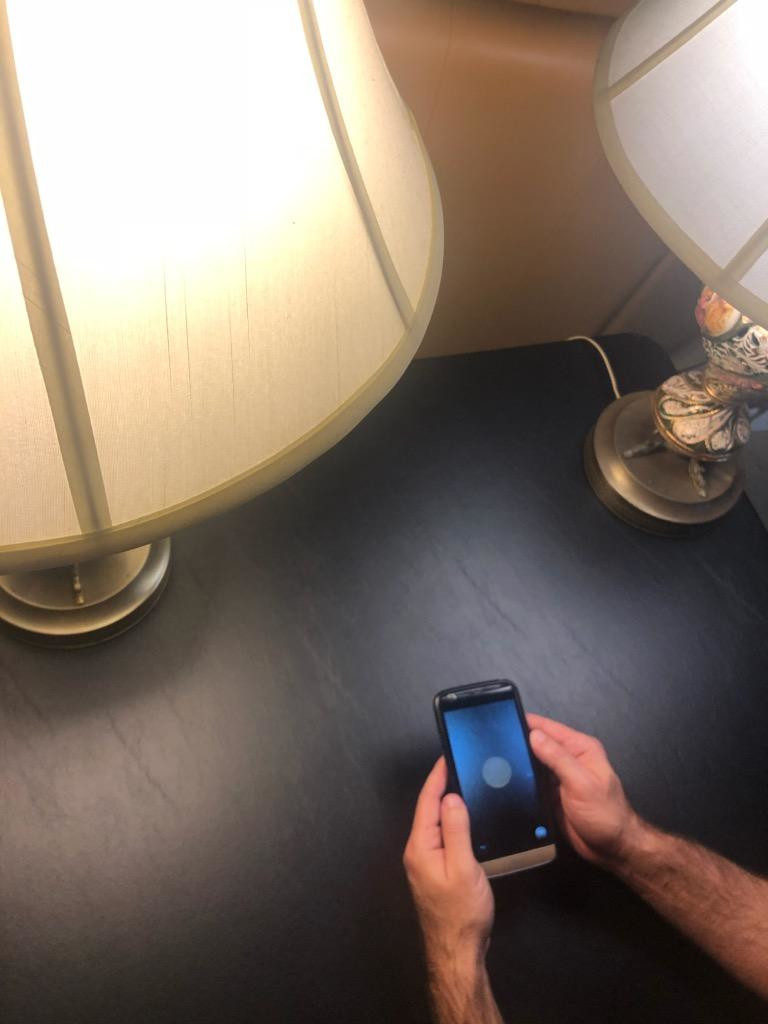
The trickiest part is not obscuring the light with your camera, hands, or tripod. Once you have your coin in focus, adjust the lighting around your coin.
4) Practicing Coin Photography in the Digital World
You have unlimited film. The only thing you don’t have is unlimited time. To get reliable, replicable results, you must take some time to practice and improve.
You want your coin evenly lit, consistently sharp, and as large as you can make it. This takes time. This takes practice. This likely takes fiddling with your set up.
But the results are worth it:
(tap images to see full screen, then pinch to zoom)
 Coin Photography Set Up Results: 2017-D Roosevelt Dime, Obverse Picture #1. This Roosevelt Dime is an excellent example why two or more photographs of each side are required.


 Coin Photography Set Up Results: Counterfeit 1922 No D Lincoln Wheat Cent, Obverse. This counterfeit 1922 No D is an excellent example of why more than one photograph of each side is needed.


See more simple coin photography set up results >
5) A Permanent Set Up for Coin Photography
If You Can
If you’re going to be photographing many coins, it’s ideal to have a spot set aside for this that you don’t have to touch. If you have to move it or break it down, mark the spots for the light, coin, and hand or tripod placement. This way, you can quickly return to your ideal situation.